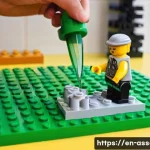
There’s something truly magical about LEGO, isn’t there? For years, I’ve been utterly captivated by those colorful plastic bricks, not just for following instructions, but for what they can truly become when you unleash your imagination.
I mean, who hasn’t dreamed of building something completely unique, a piece that screams ‘you’ from across the room? In an era where mass-produced toys can feel a bit soulless, the urge to create something bespoke, something that stands out, has never been stronger.
We’re witnessing a massive surge in people — from passionate adult fans (AFOLs) to young builders — diving deep into custom LEGO art, pushing boundaries far beyond the official sets.
It’s more than just a hobby; it’s a powerful form of self-expression that connects us with a vibrant, global community of fellow creators. From intricate, display-worthy sculptures to personalized minifigures that tell *your* unique story, the possibilities are literally as boundless as your creativity.
I’ve personally found immense satisfaction in transforming a pile of common bricks into something entirely my own, something that wouldn’t exist otherwise.
This trend towards unique, personalized creations, often leveraging digital design tools like BrickLink Studio before a single brick is touched, is truly shaping the future of play and art.
Let’s find out exactly how to dive in.
Unearthing Your Vision: The Heart of Custom LEGO Creation

1. Conceptualizing Your Dream Build
There’s nothing quite like that initial spark, isn’t there? The moment an idea for a custom LEGO build truly ignites in your mind. For me, it often starts with a random object I see, a scene from a movie, or even just a feeling I want to express.
I remember vividly wanting to build a miniature, dilapidated steampunk airship that looked like it had seen better days, battered but still brimming with character.
It wasn’t about following instructions; it was about capturing an aesthetic. This phase is less about bricks and more about brainstorming. Grab a notebook, open a digital sketchpad, or just let your mind wander.
Think about the scale you envision, the dominant colors, the overall mood, and any specific functionalities. Do you want it to be a static display piece, or something interactive?
Who is it for? Is it purely for your own enjoyment, or do you hope to share it with a wider audience? I’ve found that the more time I spend fleshing out this initial concept, the smoother the entire building process becomes.
It prevents that frustrating moment later on where you’re halfway through and realize you don’t actually know where you’re going. Don’t be afraid to create a mood board of images, textures, and even sounds that inspire you; it’s all part of the artistic journey.
2. Translating Ideas into Initial Sketches and Mock-ups
Once that initial flicker of an idea has taken hold, the next crucial step, in my experience, is to get it out of your head and onto a canvas, whether that’s paper or a digital screen.
For my steampunk airship, I started with really rough pencil sketches, just blocking out the main shapes and proportions. It was messy, but it allowed me to quickly iterate on different wing designs and engine placements without committing any actual bricks.
I often use graph paper to help maintain a sense of scale, knowing that each square can roughly represent a LEGO stud. Don’t worry about artistic talent here; these aren’t for a gallery, they’re for *you*.
Alternatively, jumping straight into a basic digital mock-up using a program like BrickLink Studio can also be incredibly effective. It’s like building with infinite, free bricks.
You can quickly snap together large sections, experiment with color palettes, and get a feel for the overall footprint of your creation. This early physical or digital mock-up helps solidify your vision and can expose potential structural weaknesses or aesthetic clashes before you invest in specific pieces.
It’s where your abstract dream starts taking its first tangible breaths.
Sourcing Your Palette: Acquiring the Perfect Bricks
1. Navigating the World of Online Brick Marketplaces
Oh, the thrill of the hunt! Once you have a clearer idea of the bricks you’ll need, diving into online marketplaces is an adventure in itself. I remember the very first time I delved into BrickLink, it felt like discovering a secret universe dedicated to LEGO.
It’s a vast platform where sellers worldwide list individual bricks, minifigures, and sets. The sheer volume of choice can be overwhelming at first, but it’s incredibly powerful.
You can search for specific part numbers, colors, and even price ranges. My pro tip? Always check a seller’s feedback rating and be mindful of shipping costs, especially if you’re ordering from multiple stores across different continents.
Sometimes, consolidating orders from fewer sellers, even if some individual bricks are a tiny bit pricier, can save you a bundle on shipping. There’s also BrickOwl, another fantastic marketplace with a similar premise, and of course, eBay or local classifieds for bulk lots.
Each platform has its quirks, but they all open up possibilities far beyond what you’d find in a standard retail set.
2. The Art of Smart Brick Procurement and Budgeting
Let’s be real, custom LEGO can get expensive, fast. This is where smart procurement truly comes into play. Before hitting “buy,” I always recommend creating a detailed parts list from your digital design (more on that later).
This list, often generated automatically by design software, will tell you exactly how many of each piece you need. Then, compare prices across different sellers.
Sometimes, buying a small, inexpensive set just for one or two rare pieces can actually be more cost-effective than buying those individual pieces on the aftermarket.
It sounds counterintuitive, but I’ve done it! Also, consider ‘parts packs’ or ‘bulk lots’ from local sellers. You might not get exactly what you need, but you’ll often discover hidden gems and versatile pieces that can spark new ideas or fill unexpected gaps.
This table compares some popular sourcing methods:
| Sourcing Method | Pros | Cons | Best For |
|---|---|---|---|
| BrickLink / BrickOwl | Specific parts, vast selection, global reach | Shipping costs can add up, requires careful store selection | Targeted part acquisition, rare pieces |
| LEGO Pick a Brick / Bricks & Pieces | Brand new, consistent quality, direct from LEGO | Limited selection, higher per-piece cost for some items | Common parts, official colors, guaranteed quality |
| eBay / Local Classifieds | Bulk lots, potential for great deals, unique finds | Quality varies, less control over specific parts | Building up a general collection, discovering new pieces |
Remember, patience is a virtue in this stage. Waiting for sales or specific parts to become available can save you a considerable amount.
Sculpting Your Creation: Digital Design & Iteration
1. Diving into Digital Design Software: BrickLink Studio and Beyond
If you’re serious about custom LEGO art, especially complex pieces, digital design software is an absolute game-changer. I honestly can’t imagine building intricate MOCs (My Own Creations) without it now.
BrickLink Studio (often just called Stud.io) is my go-to, and for good reason. It’s free, intuitive, and boasts an incredibly comprehensive parts library that’s constantly updated.
You can design your model piece by piece, experiment with colors that you might not even own yet, and visualize the full scope of your project. The learning curve isn’t steep, and there are tons of community tutorials available.
Beyond Studio, there are other tools like LEGO Digital Designer (LDD), though it’s less frequently updated, and LDraw, which is more open-source and has a steeper learning curve but offers incredible precision for advanced users.
My personal experience has shown me that starting digitally saves a tremendous amount of time and frustration. You can identify structural weaknesses, check for color clashes, and even test out different building techniques without having to physically disassemble and reassemble repeatedly.
It’s like having an infinite supply of virtual bricks at your fingertips.
2. Leveraging Digital Tools for Stability and Aesthetic Refinement
The real power of digital design, I’ve discovered, lies in its ability to facilitate endless iteration and refinement *before* you commit to purchasing any bricks.
You can stress-test connections, ensure structural integrity, and experiment with subtle aesthetic changes. For example, my steampunk airship model went through at least five major digital revisions before I was satisfied with its profile and internal support structure.
1. Stability Checks: Using features like collision detection, you can spot where pieces might interfere with each other or where your design might be too fragile.
2. Color Palette Exploration: Ever wondered what your build would look like in shades of dark green instead of dark blue? Digital software lets you swap colors instantly, giving you visual feedback that’s impossible with physical bricks unless you own an enormous collection.
3. Instruction Generation: One of the most underrated features of Studio is its ability to generate step-by-step building instructions from your finished model.
This is incredibly useful not just for sharing your design with others, but also for guiding *your own* physical build process, especially for larger, more complex creations.
It transforms a daunting pile of bricks into a manageable, enjoyable construction project. 4. Parts List Export: Crucially, these programs can export a precise parts list, often directly linked to BrickLink, making the procurement process incredibly efficient.
It’s a game-changer for budgeting and sourcing.
The Physical Build: Bringing Your Vision to Life
1. From Screen to Brick: The Transition and Its Challenges
Ah, the moment of truth! You’ve got your meticulously designed digital model, your carefully sourced bricks are sitting there, ready to be assembled. This transition from the virtual to the physical can be surprisingly challenging, but also incredibly rewarding.
I’ve often found that what looks perfect on screen doesn’t always translate flawlessly in real life. Sometimes a connection isn’t as strong as I anticipated, or a subtle curve doesn’t look quite right from a different angle.
It’s a humbling process. I remember one specific section of my airship, a delicate rigging system, that I thought was brilliantly engineered digitally.
In reality, the weight distribution was off, and it sagged miserably. This is where patience and adaptability become your best friends. Don’t be afraid to deviate slightly from your digital plan if a physical solution presents itself.
It’s a collaborative process between your initial vision and the inherent properties of the bricks themselves.
2. Troubleshooting, Iteration, and the Joy of Discovery
This is where the true “art” of custom LEGO building, for me, really shines. It’s the problem-solving, the little “aha!” moments, and the unexpected discoveries you make along the way.
When that rigging system on my airship failed, I spent an entire afternoon experimenting with different connection points and reinforcement techniques, trying various pieces I hadn’t even considered in the digital phase.
It’s a hands-on, tactile puzzle. You’ll likely encounter moments where a section just isn’t stable enough, or a gap appears where you didn’t want one.
Instead of getting frustrated, view these as opportunities. Can you use a different piece in a clever way? Is there an unconventional building technique that could solve the issue?
This iterative process, constantly building, testing, and refining, is where your true expertise as a builder develops. The sheer joy of finally getting a tricky section to work, of seeing your physical creation slowly take shape in all its tangible glory, is an unparalleled feeling that makes all the previous struggles completely worth it.
Showcasing Your Creation: Photography & Display
1. Capturing Your Masterpiece: Photography Tips for LEGO Art
You’ve poured hours, days, even weeks into your custom LEGO creation. Now, it’s time to show it off to the world, and good photography is absolutely crucial for this.
It can truly elevate your work from a simple build to a piece of art that inspires others. I learned this the hard way, with blurry, poorly lit photos that didn’t do my early MOCs any justice.
My biggest piece of advice: lighting, lighting, lighting! Natural light is your best friend – near a window, but avoid direct sunlight which creates harsh shadows.
If natural light isn’t an option, invest in a couple of inexpensive LED lights. A clean, uncluttered background is also key; a plain white or black backdrop works wonders to make your model pop.
Experiment with different angles. Get down low for a dramatic perspective, or shoot from above to show off intricate details. And don’t forget close-ups!
Macro shots can highlight those ingenious building techniques you used. Even a smartphone camera can produce stunning results if you pay attention to these basics.
Remember, your photos are often the first, and sometimes only, way people will experience your build, so make them count!
2. The Art of Display: Presenting Your LEGO Art to the World
Beyond the digital realm, how you display your physical creation can make a huge difference in how it’s perceived and enjoyed. Think of it as framing a painting.
For my steampunk airship, I built a custom stand that resembled a rickety old docking platform, adding context and immersing the viewer in the scene. A simple acrylic display case can protect your build from dust (a constant nemesis for LEGO collectors!) and curious hands, while also giving it a more polished, professional look.
Consider the environment where your MOC will live. Is it a shelf, a desk, or a dedicated display area? How does the lighting in that space interact with your build?
I’ve seen builders use clever LED strip lights to illuminate specific features of their models, creating a truly dynamic presentation. Don’t underestimate the power of a well-presented piece; it commands attention and elevates your hard work from a mere toy into a genuine work of art, inviting admiration and sparking conversation.
Connecting & Thriving: Community and Growth in Custom LEGO
1. Engaging with the Global AFOL Community
One of the most enriching aspects of custom LEGO art is the incredible community surrounding it. AFOLs – Adult Fans of LEGO – are some of the most passionate, creative, and supportive people I’ve ever encountered.
Platforms like Instagram, Flickr, and dedicated forums like Eurobricks or Brickset are vibrant hubs where builders share their latest creations, offer constructive feedback, and discuss new techniques.
I remember feeling a bit intimidated when I first started sharing my work online, wondering if it was “good enough.” But the overwhelming positivity and willingness of others to offer advice was truly inspiring.
Participate in online contests, join local LEGO User Groups (LUGs) if you have them, and don’t be afraid to comment on other people’s builds. The insights you gain from seeing how others approach challenges, the friendships you forge, and the sheer joy of shared passion are invaluable.
It’s a global family united by plastic bricks.
2. Continuous Learning and Evolving Your Building Style
The journey of custom LEGO building is never-ending; there’s always something new to learn, a new technique to master, or an unreleased part to integrate into your designs.
I make it a point to regularly browse new official LEGO sets, not just for potential parts, but to study the innovative building techniques that LEGO designers use.
Dissecting how they achieve certain shapes or functions can be incredibly educational. Watch YouTube tutorials, read in-depth MOC reviews, and challenge yourself with new themes or scales.
Don’t be afraid to step outside your comfort zone. My style has evolved significantly over the years, moving from purely mechanical builds to more organic, landscape-focused scenes.
This continuous exploration keeps the hobby fresh and exciting. Embrace criticism as an opportunity to grow, and celebrate every small victory. The world of custom LEGO is constantly expanding, and by staying curious and engaged, you’ll ensure your own creative journey continues to be as fulfilling as possible.
Closing Thoughts
Embarking on the journey of custom LEGO creation is truly an adventure, one that combines artistry, engineering, and boundless imagination. It’s a deeply personal process, from the initial spark of an idea to the satisfying click of the final brick. Remember, every master builder started somewhere, and the most rewarding aspect isn’t always the perfect finished product, but the growth, the learning, and the sheer joy found in bringing a unique vision to life, one brick at a time. So, dive in, experiment, and most importantly, have fun creating something truly yours.
Useful Information
1. Start Small: Don’t feel pressured to build a massive MOC right away. Begin with a smaller project to learn the ropes of digital design and brick procurement without feeling overwhelmed.
2. Join a Community Early: Engaging with other AFOLs on platforms like Instagram, Flickr, or dedicated forums provides invaluable feedback, inspiration, and a sense of belonging.
3. Leverage Digital Tools: BrickLink Studio (Stud.io) is free and powerful. Mastering it will save you time, money, and frustration by allowing extensive iteration before you buy any physical bricks.
4. Patience is Key for Sourcing: Finding the right bricks at the right price can take time. Compare sellers, look for bulk deals, and be open to slightly adjusting your design based on part availability.
5. Document Your Process: Take photos and notes at every stage. This helps you troubleshoot, track your progress, and can be a great way to share your creative journey with others later on.
Key Takeaways
Custom LEGO building thrives on imagination and systematic planning. Start with a clear concept, leverage digital design for precision and iteration, and meticulously source your bricks. The physical build is where challenges transform into opportunities for ingenious solutions. Finally, share your creations through quality photography and engage with the vibrant AFOL community for continuous growth and inspiration.
Frequently Asked Questions (FAQ) 📖
Q: How do I actually get started if I’ve only ever built official sets? It feels a bit daunting to just ‘create.’
A: This is such a common feeling, and honestly, it’s exactly where I was once! The biggest hurdle is often just taking that first leap. My personal advice?
Don’t aim for a masterpiece right away. Start small. Pick a theme you absolutely adore – maybe your favorite movie scene, a quirky little character, or even just a unique color combination.
Grab a handful of bricks you already own and just play. Seriously, just let your hands explore. I remember my first attempt was a tiny, rather lopsided spaceship that barely held together, but the feeling of bringing something completely new into existence was exhilarating.
You might even try modifying an existing set first – swap out a piece here, add a small detail there. It’s like dipping your toe in the water before you dive headfirst.
There are tons of free online resources, YouTube channels, and even simple tutorials on sites like New Elementary or The Brothers Brick that can spark ideas.
Just focus on enjoying the process; the “masterpiece” will follow in its own sweet time.
Q: Okay, but where do people even get specific or rare bricks for these custom builds? It seems like official sets don’t always have what you need.
A: Ah, the eternal quest for that perfect brick! This is where the magic of the secondary market truly shines. You’re absolutely right; you won’t always find that specific dark green tile or a unique slope in your existing collection.
My go-to, and what most serious custom builders use, is BrickLink. Think of it as eBay specifically for LEGO parts, but on steroids – it’s a massive marketplace where individual sellers from all over the world list their inventories.
You can find virtually any element ever produced, from a single 1×1 plate to obscure minifigure accessories. I’ve spent hours scrolling through pages, hunting for that one elusive piece that just clicks with my vision.
Prices vary, but you can often snag parts for a few cents each. Another great option is LEGO’s own Pick a Brick service, both online and in physical LEGO Stores; it’s usually more limited in selection than BrickLink but can be fantastic for common elements or specific colors.
And honestly, don’t underestimate yard sales, flea markets, or even thrift stores for bulk buys – you might just stumble upon a hidden gem in a dusty bin!
It’s all part of the treasure hunt, and that’s half the fun.
Q: I hear people talk about “digital design tools.”
A: re those really necessary, or can I just build with bricks directly? A3: That’s a fantastic question, and it really comes down to your personal workflow and the complexity of what you’re trying to achieve.
When I first started, it was all hands-on, directly with bricks – and there’s still a visceral joy in that immediate, tactile process. You absolutely can just dive in with physical bricks, especially for smaller or more organic builds.
However, for larger, more intricate, or technically challenging creations, digital tools like BrickLink Studio (formerly LEGO Digital Designer) have been an absolute game-changer for me.
Imagine being able to “test build” your creation virtually, checking for structural integrity, trying out different color schemes, or even seeing if a particular connection works before you’ve spent a single penny on parts.
It saves so much time, money, and frustration. I’ve personally had countless moments of “aha!” where a digital design helped me avoid a real-world building disaster.
Plus, these tools often integrate with BrickLink, making it incredibly easy to generate a parts list for your design and order everything you need with a few clicks.
For anything more than a quick sketch, I now almost always start digitally; it’s like having an infinite supply of every brick at your fingertips. It’s not “necessary,” but once you try it, it’s hard to go back!
📚 References
Wikipedia Encyclopedia
구글 검색 결과
구글 검색 결과
구글 검색 결과
구글 검색 결과
구글 검색 결과